It’s back to school, which means it’s back to piles of artwork on my kitchen counter. I love that my kids are getting their creative juices flowing at school, but it’s not feasible to save or display every handprint animal or perfect spelling test that comes home. And when one of their papers “accidentally” ends up in the garbage can hidden under last week’s half-eaten bag of spinach, they always seem to find it.
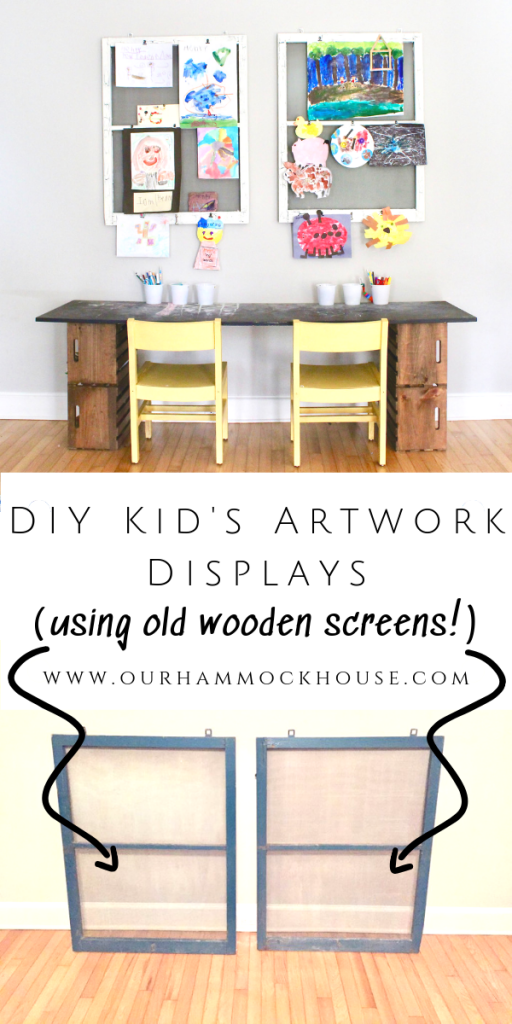
To help solve this problem, I’ll show you how I took two old wooden screens and repurposed them into kids’ artwork displays.

In the boys’ playroom, their desk sits along a big empty wall. I knew that wall was the perfect spot to display their artwork, but I wasn’t sure how I wanted to do it. So, I went to my favorite thrift store/junk shop, the Repurpose Project, for inspiration.
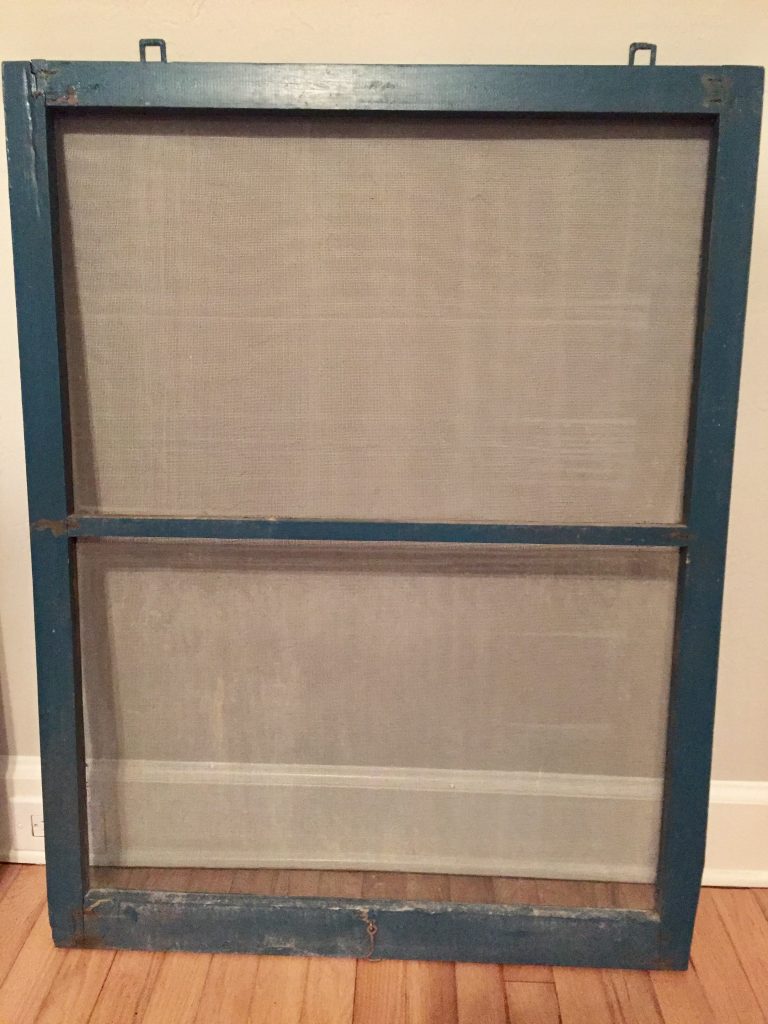
I thought I might be able to find some old window frames that I could turn into a display. Instead, what I came across were some old wooden screens. They were the perfect size, and unlike a window frame, they were lightweight and would be easy to hang.

An extra bonus? They already had brackets attached to the top, which I could use to hang them. And, I loved the fun little detail of the hook at the bottom. Oh, and they were like $5 each. Score!
The first thing that I did was give them a good cleaning outside with the hose and some soap. Then, I decided to give them a fun paint finish. I had been wanting to try a crackle paint finish (which is where the top coat of paint is cracked and you can see the color beneath), and I figured this would be a good project to try it on, because I liked the original blue color that would show underneath.
I read a few different tutorials online, and it seemed pretty straightforward – and kind of fun. All you really need is Elmer’s Glue and paint. After covering the edges of the screen with painter’s tape, I used a brush to paint on a thick layer of Elmer’s Glue.

Here’s the key part: once the glue was somewhat dry, but still sticky, I used a paintbrush and applied the paint. After that, the magic happens! Because as the glue dries, it shrinks and causes the paint on top of it to crack. That is what gives it the crackle effect. Cool, huh?

{Slightly dry, but still sticky, glue}

{Cracks in the paint as it dries}

{Original blue paint shows through the cracks}
Once the paint was completely dry, I removed the painter’s tape, and added clips for the artwork. I used these hinge clips (also called “bulldog clips”) and just attached them to the wood with thumb tacks:

All that was left to do was hang the screens on the wall and display some artwork!

If you have any other ideas of how to display or save your kids’ artwork, I’d love to hear them!